Sunday, March 25, 2007

Bath Tub Remodel

I decided to remove the old, dirty bath tub and install a new one, including a 3-piece shower surround.
Here's the old steel tub, surrounded by tiles. The tub was well worn on the bottom with a few chips, and the tiles were worse than they look in this picture. Caulk was peeling and I could tell water had gotten behind them in the past. You can see where I tried to apply a new caulk strip on the left, and then I just applied a glob of silicone after that.


Here's a close-up of the old tile work. Disgusting. When I pulled a few tiles out, here's what I found:
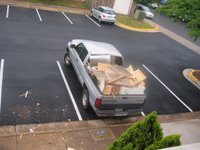
Continuing with the demolition:


In order to remove the tub, it had to be cut. I ended up having to cut it into 5 pieces.

We cleared out the rubble, did a dry fit with the new tub, and then put in the new plumbing:


Tub and surround put in place:

Dry wall in place:


I just need to finish painting and then put a few tiles around the edges.

Sunday, July 09, 2006

Kitchen project part 2

Poof! Here's the new kitchen.


There are too many photos of the work in progress to post. We still need to repaint. And I think we will add ceramic tiles as a backsplash.

Friday, June 16, 2006

Kitchen project start


Here's our old kitchen which I think is original - about 30 years old. It's yucky-colored, banged-up, and a drawer is broken. I can't fix the drawer because it's an odd pre-fabricated plastic part.

Below is another picture of the old kitchen:

It fits in the back of a pick-up truck. Unfortunately, the demolition team didn't coordinate with the cabinet company. Cabinets not ready. So we're limiting our dish use and doing dishes in the bathroom sink. We eat out a lot.

What's left. A bit messy back there. The workers came back, added some extra insulation and patched up the drywall. I added a few more tiles to the floor since the new layout doesn't exactly line up with the old layout.


More to come.

Friday, May 26, 2006

Patio Project finished

It took about 7 more bags of sand to level off the patio base. I then put down the stones and finished by sweeping sand into the gaps.

Sunday, May 21, 2006

Patio Project part 2

I've been working on digging properly. This Sunday a friend helped me haul all the gravel and sand. I bought 30 bags of gravel and 10 bags of sand. Each bag must weigh about 40 lbs. I'll be laying 30 16" stones. This stuff is heavy. Unfortunately, my friend was only available to help haul it to my house - not to actually help put it together. this hole since February and finally got around to squaring it out The depth of the hole is really only about 6.5 inches. The patio stones are 1.5 inches thick and I'll level them with the exisiting concrete patio. I started out by filling about an inch of gravel.
After every layer, I had to pack it down with the tamper. On top of this first layer, I put down some landscape fabric to keep the weeds from growing. I then spread another layer of gravel about 1.5 inches thick.

Finally, I put on the sand layer. It turns out, I'm still about an inch short so I'll need about 10 more bags of sand. Hopefully I'll be able to finish this project by the end of the week.

Wednesday, April 26, 2006

Half bath re-do finished

I finally got together all of the parts and pieces, including putting on new shut-off valves. Main problem here is not having enough copper pipe to cut the old compression ring off and start anew. This required a sleeve puller to slide off the old compression ring. The first try was not tight enough, so when I turned the main water supply back on and ran upstairs to check, water spraying everywhere. After a few adjustments everything seems fine. I might decide later on to add some tiles as a backsplash, but I'm not sure yet.

Sunday, April 09, 2006

Half bath re-do part 2

Here is the latest in progress on the half bath. We did this over 2 weekends.


A friend and I cleaned out the tile-less space by pulling up the old tiles and backer board and chiseling out all the grout and cement. Those tiles may have contained asbestos....


We then cut to size a new piece of cement backer board and screwed it into the wood floor.

After that, it was time to cut some tiles. I borrowed a tile cutter from a friend and we measured and cut the tiles so that they would match up with the original layout.


We then used a pre-mixed thinset and placed the tiles. I let this sit for 4 days before grouting, just to be sure it had set.


I didn't exactly match the grout color - I bought one that was whiter than what was already on the floor. It doesn't matter too much since the vanity will be over it. I let the grout set for 24 hours.

During this time, I lightly sprayed and wiped it with a sponge about half a dozen times. I then sprayed on a penetrating sealer.


Here I've put back new baseboards.